Connecting Solar Panels to an Inverter A Step-by-Step Guide
Connecting Solar Panels to an Inverter: A Step-by-Step Guide
Understanding the Basics of Solar Panels and Inverters
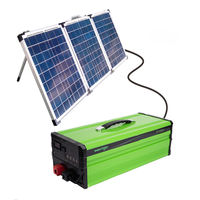
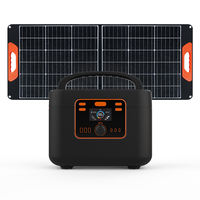
Solar energy is an exciting and sustainable way to power your home or business. At the heart of any solar power system are solar panels, which convert sunlight into electricity, and inverters, which transform that electricity into a usable form. Understanding how to connect these components is crucial for anyone considering a solar energy setup. This article walks you through the essential steps to connect your solar panels to an inverter efficiently and safely.
Gathering the Necessary Equipment
Before starting the installation process, it’s vital to gather all the necessary tools and equipment. Typically, you will need solar panels, a compatible inverter, mounting hardware, wiring, connectors, and safety gear. Ensure that the inverter is appropriate for the wattage produced by your solar panels to achieve optimal performance. Double-check your local regulations to ensure compliance with safety codes and standards.
Preparing the Installation Site
The installation site plays a crucial role in the efficiency of your solar power system. Choose a location that receives maximum sunlight throughout the day, usually a south-facing roof or an open field. Once you’ve identified the ideal site, prepare the area for mounting your solar panels. Ensure that the surface is clean, stable, and free from obstructions such as trees or buildings that could cast shadows on the panels.
Mounting the Solar Panels
Once the site is prepared, it’s time to mount your solar panels. Carefully follow the manufacturer’s instructions for mounting the solar panels securely. Depending on the type of mounting system, you may need to drill holes into your roof or use a ground-mounted framework. Ensure that all panels are installed at the correct angle to maximize solar exposure. Properly securing your panels is essential for preventing damage during severe weather conditions.
Connecting the Wiring
With the panels mounted, the next step is connecting the wiring. First, connect the panels in series or parallel, depending on your system's design and the inverter’s specifications. Use high-quality connectors and cables to ensure a safe and efficient connection. Make sure to follow the wiring diagram provided by the inverter’s manufacturer. Once your solar panels are connected, you’ll then run the wiring to the inverter location.
Installing the Inverter
Next, install the inverter in a location that is easily accessible, cool, and dry to ensure optimal performance. Mount the inverter according to the manufacturer's guidelines, typically on an exterior wall or a dedicated stand. Once mounted, use the appropriate cables to connect the solar panel array to the inverter. Ensure all connections are tight and secure to avoid any power loss.

Final Steps and Safety Checks

After all connections are made, it’s essential to double-check each step to ensure everything is installed correctly. Inspect all wiring for any potential issues and confirm that no wires are exposed. Conduct a final inspection of your solar panel setup to ensure compliance with local electrical codes and safety regulations. If needed, consider hiring a professional to review your work before turning on the system.
Turning on the System
Once you are confident that everything is correctly installed and safe, you can turn on the inverter and your solar power system. Monitor the system’s performance for the first few days to ensure everything is operating as expected. Make use of the inverter’s monitoring features to track energy production and ensure your solar system is working efficiently to harness the power of the sun. Enjoy the savings and eco-friendly benefits that come with your new solar energy setup!